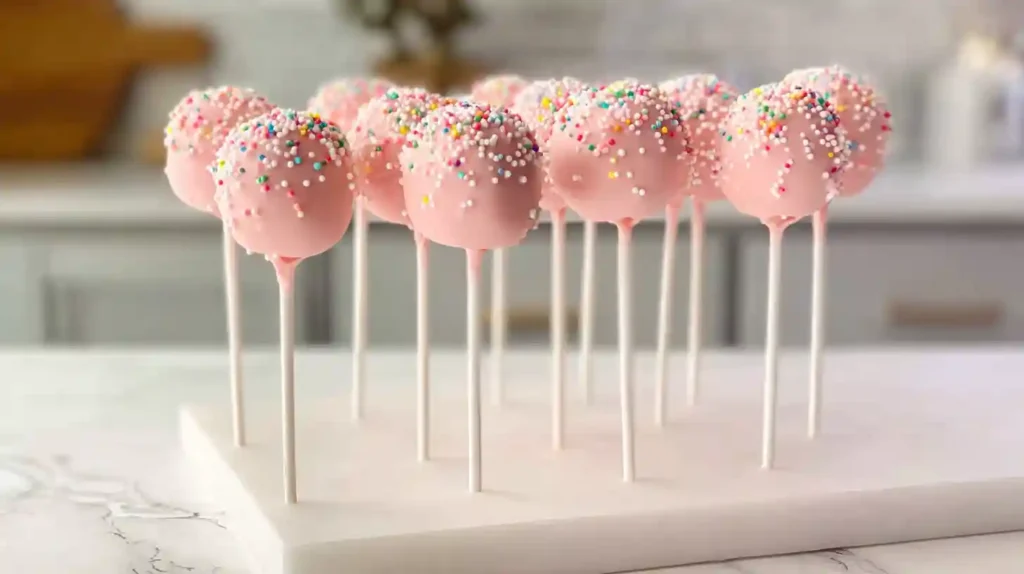
I distinctly remember the first time I paid nearly three dollars for a single bite of cake on a stick. It was delicious, undeniably, but my wallet felt the pinch immediately. That iconic pink treat has become a staple for afternoon pick-me-ups, but making Starbucks Copycat Birthday Cake Pops at home is surprisingly satisfying and way more budget-friendly. You get to control the ingredients, skip the line, and frankly, you get to eat the “mistake” pops that slide off the stick before anyone sees them.
The secret isn’t actually in the baking skill it is all about the texture of the filling. If you have ever wondered why the coffee shop version tastes almost like cookie dough or a truffle rather than fluffy cake, it is because of how the baked cake is compressed with frosting. It creates that signature dense, fudgy bite that makes these so addictive. Whether you are prepping for a party or just need a sweet project for a rainy Tuesday, this method gets you that exact taste without needing a degree in pastry arts.
Why This Starbucks Copycat Birthday Cake Pops Recipe Works
Most people overcomplicate cake pops by trying to make them “healthy” or changing the base too much. To get that authentic flavor, we stick to the basics. The combination of classic white cake and vanilla frosting is non-negotiable for the flavor profile. What sets this recipe apart is the focus on the coating temperature. If your chocolate is too hot, the cake ball expands and cracks. If it is too cold, it clumps. We will hit that sweet spot so your coating looks smooth and professional.
This method also allows for flexibility. You can bake a cake from scratch if you are feeling ambitious, but honestly, a box mix often yields a texture that is closer to the original because of the stabilizers. It holds its shape better when mixed with frosting.
Ingredients for Homemade Cake Pops
We keep the list short to focus on technique. You likely have most of these in your pantry already.
- 1 box white or vanilla cake mix (plus ingredients on the box: eggs, oil, water)
- 1/2 cup vanilla frosting (store-bought works perfectly here for stability)
- 12 oz pink candy melts (Wilton or similar brand works best)
- 1 tablespoon vegetable oil or coconut oil (to thin the candy coating)
- 2 tablespoons white nonpareil sprinkles
- 30 lollipop sticks
Step-by-Step Instructions
1. Bake and Cool the Cake
Bake the cake according to the package directions in a 9×13 pan. It does not need to look pretty since we are going to destroy it anyway. Once baked, let it cool completely. This is crucial—if the cake is even slightly warm, it will melt the frosting and your pops will be greasy mush.
2. Crumble and Mix
Crumble the cooled cake into a large bowl. I like to use my hands to break it down into fine crumbs, ensuring there are no large crusty pieces left. Add the frosting starting with a smaller amount. Use your hands to massage the frosting into the crumbs until the mixture holds together like play-dough. If it cracks when you roll a ball, add a tiny bit more frosting.
3. Roll and Chill
Scoop tablespoon-sized portions and roll them into tight, smooth balls. Place them on a parchment-lined baking sheet. Chill the balls in the freezer for 15 minutes or the fridge for an hour. You want them firm but not frozen solid.
The Secret to Smooth Coating
This is where most people struggle, so pay attention to the consistency. You want the melted candy to flow like honey, not like peanut butter.
Melt the candy melts in the microwave in 30-second intervals, stirring vigorously in between. Even if it looks solid, stir it the residual heat does the work. Once melted, stir in the oil. This thins the chocolate, making it easier to dip and ensuring a thinner, snappier shell that doesn’t weigh down the cake ball.
Before dipping the whole ball, dip the tip of your lollipop stick into the melted candy about half an inch. Push the stick into the center of a chilled cake ball. This creates a “glue” that keeps the ball from falling off into the abyss of your chocolate bowl. Let these sit for 5 minutes to set.
Dipping and Decorating
Hold the cake pop by the stick and submerge the ball fully into the pink coating. Do not swirl it around aggressively. Lift it out and tap your wrist gently to shake off excess coating. If you shake the stick itself, the ball might fly off. Rotate the pop as you tap to keep the coating even.
While the coating is still wet, sprinkle the white nonpareils on top. Place the stick upright in a styrofoam block or a cardboard box with holes punched in it to dry. If you lay them flat, you will get a flat spot on one side.
Troubleshooting Common Mistakes
Even seasoned bakers run into issues with cake pops. Here is how to fix them.
- Cracked coating: Your cake balls were too cold when dipped. The cake expanded as it warmed up, cracking the hard shell. Let your balls sit at room temperature for a few minutes before dipping.
- Oily pops: You used too much frosting. The ratio is important. Start with less frosting than you think you need; you can always add more, but you can’t take it out.
- Falling off the stick: You skipped the “glue” step, or your mixture is too heavy. Make the balls smaller next time, about 1 inch in diameter maximum.
Storage and Make-Ahead Tips
These treats are actually better the next day, making them perfect for parties.
Fridge: Store finished pops in the refrigerator for up to a week. The cold keeps the inside dense and fudgy. Freezer: You can freeze the undipped cake balls for up to 2 months in an airtight container. Thaw them in the fridge before dipping. Room Temp: They are safe at room temperature for 2-3 days, provided it is not hot enough to melt the candy coating.
FAQ
Can I use white chocolate instead of candy melts?
Yes, you can use high-quality white chocolate chips with pink oil-based food coloring. Do not use water-based food coloring or the chocolate will seize and become clumpy.
Why is my candy coating too thick?
Candy melts can be thick straight out of the bag. Adding a teaspoon of coconut oil or vegetable shortening helps thin it out to a dipping consistency without affecting the taste.
How do I keep the cake pops standing up to dry?
If you don’t have a styrofoam block, use an empty egg carton turned upside down. Poke small holes in each egg mound and slide the sticks in.
Can I use a homemade cake recipe?
Absolutely. A sturdy butter cake or pound cake works well. Just avoid very light, airy chiffon cakes as they don’t bind as easily with the frosting.
How many calories are in a Starbucks Copycat Birthday Cake Pop?
These homemade versions typically run between 150-180 calories per pop, depending on the size of the ball and thickness of the coating.
Can I make these vegan?
Yes! Use a vegan cake mix (many box mixes are accidentally vegan), vegan vanilla frosting, and vegan white chocolate or dairy-free candy melts.

Starbucks Copycat Birthday Cake Pops
Ingredients
Equipment
Method
- Bake the cake according to package instructions and allow it to cool completely.
- Crumble the cooled cake into a fine texture in a large bowl.
- Mix in the frosting by hand until the dough holds together firmly.
- Roll the dough into tablespoon-sized balls and chill for 15 minutes.
- Melt the candy coating with oil until smooth.
- Dip sticks into candy, insert into balls, and chill again for 5 minutes.
- Coat each cake pop in the pink candy, shake off excess, and top with sprinkles.
Notes
- Ensure cake is fully cooled before mixing to prevent greasy dough.
- Thin the candy melts for a smoother finish.